Unity 전체 링크
Cinemachine Tutorial
- (1) Project Settings
- (2) 마우스 버튼 클릭으로 FreeLook Camera 컨트롤하기 (Control FreeLook with Mouse Button Click)
- (3) 마우스 스크롤로 FreeLook Camera Zoom in / out
깃허브에서 코드 확인하기
FreeLook 카메라를 이용하면 오브젝트를 중심으로 특정 구간 내에서 오브젝트를 관찰할 수 있다.
시네머신은 브레인 카메라 1대와 여러 대의 가상 카메라로 이루어진다.
가상 카메라가 하나만 활성화된다면, Brain Camera는 이 가상 카메라의 설정을 가져온다.
현재 프로젝트에는 MainCamera에 CinemachineBrain이 설정되어 있다.

그리고 PlayerFollowCamera에 VirtualCamera가 설정되어 있다.
여기서는 FreeLookCamera를 사용하기 때문에 오브젝트를 disabled 한다.

이제 [Cinemachine] → [FreeLook Camera]를 추가하자.

프리룩 카메라는 오브젝트를 중심으로 Follow와 Look At에 설정한 Target을 관찰할 수 있다.
CM FreeLook1이 생성되면 Follow와 Look At에 PlayerArmature를 설정한다.
Look At은 목 부분을 바라보도록 PlayerCameraRoot를 넣었다.

이제 게임을 실행해보자.
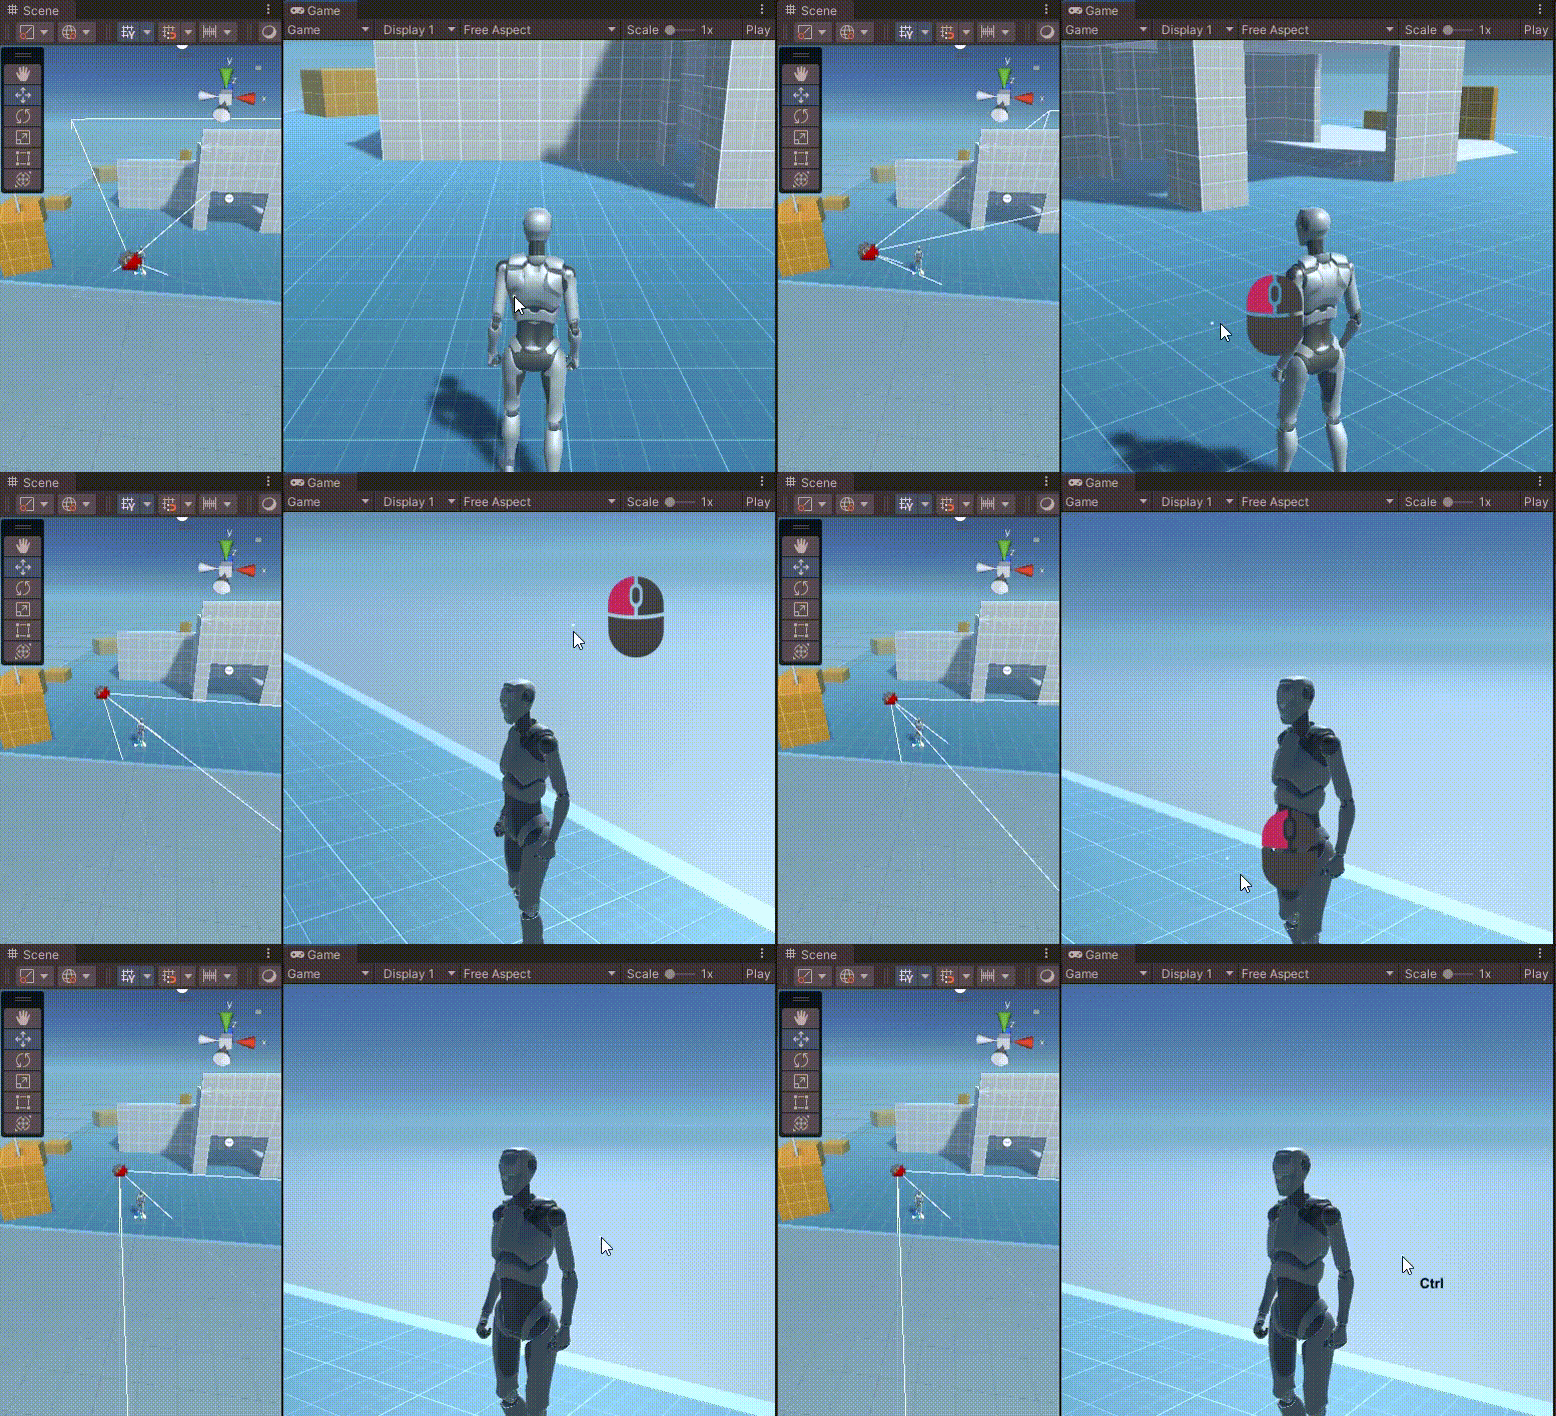
마우스를 클릭하지 않아도 마우스의 움직임을 감지해서 오브젝트 주의를 촬영한다.

마우스를 클릭할 때만 시네머신 카메라를 움직이려면 약간의 조작이 필요하다.
CinemachineCore의 GetInputAxis를 다른 함수로 교체한다.
CMFreelookSetting.cs를 CM FreeLook1에 추가한다.
clickControl이 마우스 왼쪽 버튼을 클릭할 때만 카메라가 움직이도록 한다.
using System.Collections;
using System.Collections.Generic;
using UnityEngine;
using Cinemachine;

public class CMFreelookSetting : MonoBehaviour
{
    void Awake()
    {
        CinemachineCore.GetInputAxis = clickControl;
    }

    public float clickControl(string axis)
    {
        if(Input.GetMouseButton(0))
            return UnityEngine.Input.GetAxis(axis);

        return 0;
    }
}
스크립트를 추가하면 마우스를 클릭할 때만 카메라가 움직인다.

Unity Plus:
Easy 2D, 3D, VR, & AR software for cross-platform development of games and mobile apps. - Unity Store
Have a 2D, 3D, VR, or AR project that needs cross-platform functionality? We can help. Take a look at the easy-to-use Unity Plus real-time dev platform!
store.unity.com
Unity Pro:
Unity Pro
The complete solutions for professionals to create and operate.
unity.com
Unity 프리미엄 학습:
Unity Learn
Advance your Unity skills with live sessions and over 750 hours of on-demand learning content designed for creators at every skill level.
unity.com
'개발 > Unity' 카테고리의 다른 글
| 유니티 컴파일 옵션 변경하기 (Recompile After Finished Playing) (0) | 2022.09.17 |
|---|---|
| (3) 마우스 스크롤로 FreeLook Camera Zoom in / out - 유니티 시네머신 튜토리얼 (0) | 2022.09.15 |
| (1) Project Setting - 유니티 시네머신 튜토리얼 (0) | 2022.09.14 |
| 유니티 - 스포트 라이트가 오브젝트를 관통하는 문제 해결하기 (How to Fix the Spot Light Through the GameObject) (1) | 2022.08.31 |
| 유니티 - 네비메쉬 에이전트의 경로를 라인 렌더러로 표시하기 (Draw the Path of NavMesh with LineRender) (0) | 2022.08.25 |


댓글