참고
→ 시네머신 튜토리얼 링크 (시네머신을 이용하여 카메라 간편하게 조작하기)
메인 카메라에 스크립트를 추가한다.
테스트하기 쉽게 왼쪽의 Alt가 입력된 경우에만 카메라가 움직이도록 하자.
    void Update()
    {
        if (Input.GetKeyDown(KeyCode.LeftAlt)) isAlt = true;
        if (Input.GetKeyUp(KeyCode.LeftAlt)) isAlt = false;

        if (Input.GetMouseButton(0))
        {
            if (isAlt)
            {
				/* Camera Move */
            }
        }
    }
Alt Input을 판단할 변수와 최초 클릭 위치, 그리고 드래그 속도를 정할 변수를 선언한다.
    bool isAlt;
    Vector2 clickPoint;
    float dragSpeed = 30.0f;
마우스 최초 클릭 시, 마우스 위치를 기억한다.
    void Update()
    {
        if (Input.GetKeyDown(KeyCode.LeftAlt)) isAlt = true;
        if (Input.GetKeyUp(KeyCode.LeftAlt)) isAlt = false;

		/* 마우스 위치 기억 */
        if (Input.GetMouseButtonDown(0)) clickPoint = Input.mousePosition;

        if (Input.GetMouseButton(0))

        ...
ScreenToViewportPoint를 이용해 현재의 마우스 위치와 마우스 최초 클릭의 clickPoint의 차이를 구한다.
그리고 Speed를 곱한 후, Translate로 이동한다.
    if (isAlt)
    {
        Vector3 position
            = Camera.main.ScreenToViewportPoint((Vector2)Input.mousePosition - clickPoint);

        Vector3 move = position * (Time.deltaTime * dragSpeed);

        transform.Translate(move);
    }
Alt키를 누르면서 마우스를 드래그해보면 아래와 같이 움직인다.
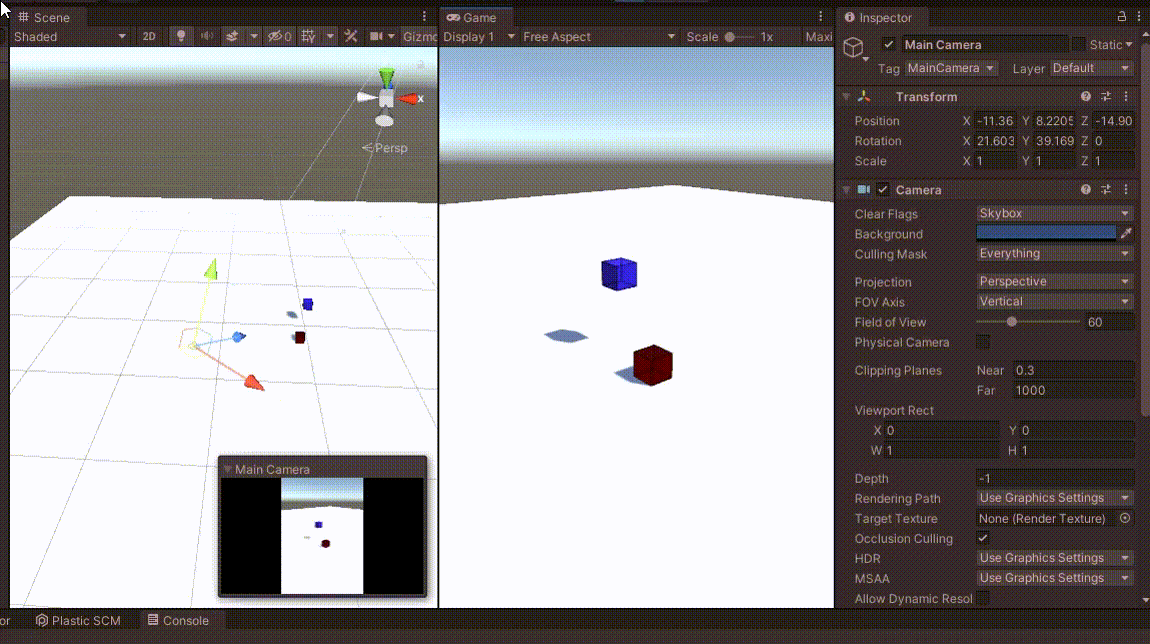
카메라가 현재 좌우/상하로 움직이고 있다.
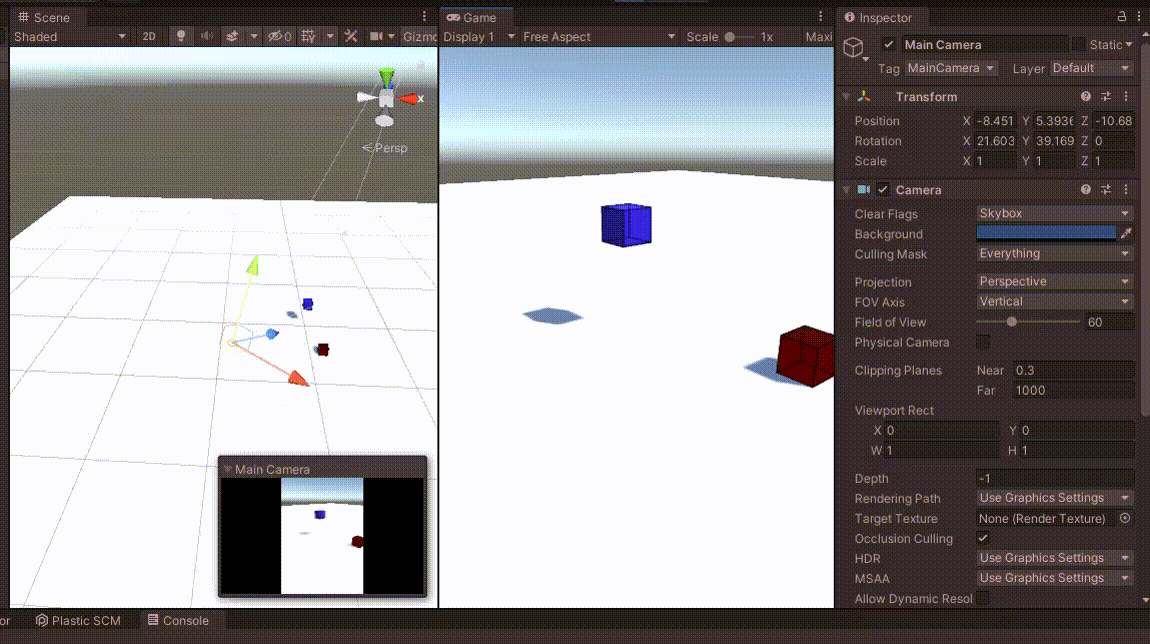
좌우/앞뒤로 움직이기 위해서는 코드를 조금 수정할 필요가 있다.
position의 z와 y를 변경한다.
    if (isAlt)
    {
        Vector3 position
            = Camera.main.ScreenToViewportPoint((Vector2)Input.mousePosition - clickPoint);

		/* 좌우, 앞뒤 이동으로 변경 */
        position.z = position.y;
        position.y = .0f;

        Vector3 move = position * (Time.deltaTime * dragSpeed);

        transform.Translate(move);
    }
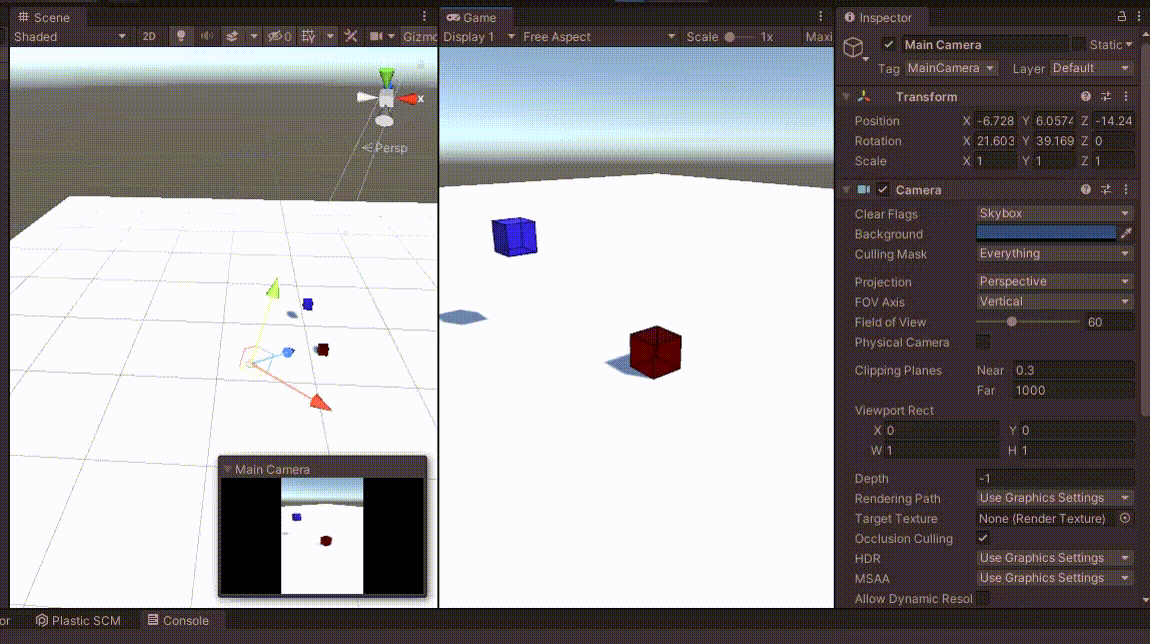
카메라가 앞/뒤로 다가갈 때, 카메라의 높이가 변경되는 것을 막고 싶다면, y축을 고정하면 된다.
    if (isAlt)
    {
        Vector3 position
            = Camera.main.ScreenToViewportPoint((Vector2)Input.mousePosition - clickPoint);

        position.z = position.y;
        position.y = .0f;

        Vector3 move = position * (Time.deltaTime * dragSpeed);

        float y = transform.position.y; /* y축 고정을 위해 기존 좌표 저장 */

        transform.Translate(move);
        transform.transform.position
            = new Vector3(transform.position.x, y, transform.position.z);
    }
위의 동영상과 달리 큐브에 다가가지 않는다.
최종 코드는 아래와 같다.
using System.Collections;
using System.Collections.Generic;
using UnityEngine;

public class DragCamera : MonoBehaviour
{
    bool isAlt;
    Vector2 clickPoint;
    float dragSpeed = 30.0f;

    void Update()
    {
        if (Input.GetKeyDown(KeyCode.LeftAlt)) isAlt = true;
        if (Input.GetKeyUp(KeyCode.LeftAlt)) isAlt = false;

        if (Input.GetMouseButtonDown(0)) clickPoint = Input.mousePosition;

        if (Input.GetMouseButton(0))
        {
            if (isAlt)
            {
                Vector3 position
                    = Camera.main.ScreenToViewportPoint((Vector2)Input.mousePosition - clickPoint);

                position.z = position.y;
                position.y = .0f;

                Vector3 move = position * (Time.deltaTime * dragSpeed);

                float y = transform.position.y;

                transform.Translate(move);
                transform.transform.position
                    = new Vector3(transform.position.x, y, transform.position.z);
            }
        }
    }
}
Unity Plus:
Easy 2D, 3D, VR, & AR software for cross-platform development of games and mobile apps. - Unity Store
Have a 2D, 3D, VR, or AR project that needs cross-platform functionality? We can help. Take a look at the easy-to-use Unity Plus real-time dev platform!
store.unity.com
Unity Pro:
Unity Pro
The complete solutions for professionals to create and operate.
unity.com
Unity 프리미엄 학습:
Unity Learn
Advance your Unity skills with live sessions and over 750 hours of on-demand learning content designed for creators at every skill level.
unity.com
'개발 > Unity' 카테고리의 다른 글
| 유니티 - 드래그로 오브젝트 Y축 회전하기 (Drag to Rotate Object in Y-axis) (0) | 2022.04.15 |
|---|---|
| 유니티 에디터 - OnDrawGizmos / OnDrawGizmosSelected로 Scene에 선 그리기 (1) | 2022.04.14 |
| 유니티 - 드래그로 오브젝트 위, 아래로 움직이기 (Drag Object in Y-Axis) (1) | 2022.04.14 |
| 유니티 - 드래그로 땅 위의 오브젝트 움직이기 (Drag and Move on the Ground) (0) | 2022.04.11 |
| 유니티 - 오브젝트를 선택된 상태로 만들기 : (2) 이미지로 만들기 (0) | 2022.04.09 |


댓글