이전 - (9) useEffect를 이용하여 handsontable 연동하기
현재 - (10) handsontable basic options
다음 - (11) handsontable setting options
handsontable에는 다양한 option이 있다.
HotTable에 option을 추가할 수도 있고,
<HotTable
  data={data}
  colHeaders={true}
  rowHeaders={true}
  width="600"
  height="300"
  licenseKey="non-commercial-and-evaluation"
/>
Handsontable을 새로 생성할 때, 옵션을 넣어줄 수 있다.
myTable = new Handsontable(container, {
  data: data: csvFile.csv,
  colHeaders: true,
  rowHeaders: true,
  licenseKey: "non-commercial-and-evaluation",
});
여기에서는 Handontable을 새로 생성할 때, 옵션을 추가해보자.
먼저 option에 대한 변경사항을 보기 위해 data를 아래와 같이 바꾸고, init을 잠시 수정하자.
//MyTable.js
import React, { useEffect } from "react";
import * as lib from "./library.js";

import "handsontable/dist/handsontable.full.css";
import Handsontable from "handsontable";
//import { HotTable } from "@handsontable/react";

let myTable;
const data = [
  ["", "Ford", "Volvo", "Toyota", "Honda","Honda","Honda","Honda","Honda","Honda","Honda","Honda","Honda","Honda","Honda","Honda","Honda","Honda","Honda","Honda","Honda","Honda","Honda","Honda","Honda","Honda","Honda","Honda","Honda","Honda","Honda","Honda","Honda","Honda","Honda","Honda","Honda","Honda",],
  ["2016", 10, 11, 12, 13],
  ["2017", 20, 11, 14, 13],
  ["2018", 30, 15, 12, 13],
  ["2018", 30, 15, 12, 13],
  ["2018", 30, 15, 12, 13],
  ["2018", 30, 15, 12, 13],
  ["2018", 30, 15, 12, 13],
  ["2018", 30, 15, 12, 13],
  ["2018", 30, 15, 12, 13],
  ["2018", 30, 15, 12, 13],
  ["2018", 30, 15, 12, 13],
  ["2018", 30, 15, 12, 13],
  ["2018", 30, 15, 12, 13],
  ["2018", 30, 15, 12, 13],
  ["2018", 30, 15, 12, 13],
  ["2018", 30, 15, 12, 13],
  ["2018", 30, 15, 12, 13],
  ["2018", 30, 15, 12, 13],
];

const init = (csvFile) => {
  console.log(csvFile);
  //if (csvFile === undefined || csvFile.HEIGHT === 0) return;

  const container = document.getElementById("hot-app");

  myTable = new Handsontable(container, {
    data: data,
    colHeaders: true,
    rowHeaders: true,
    licenseKey: "non-commercial-and-evaluation",
  });
};

const MyTable = ({ csvFile }) => {
  useEffect(() => {
    init(csvFile);
  }, [csvFile]);

  return (
    <div>
      <div id="hot-app">
      </div>
    </div>
  );
};

export default MyTable;
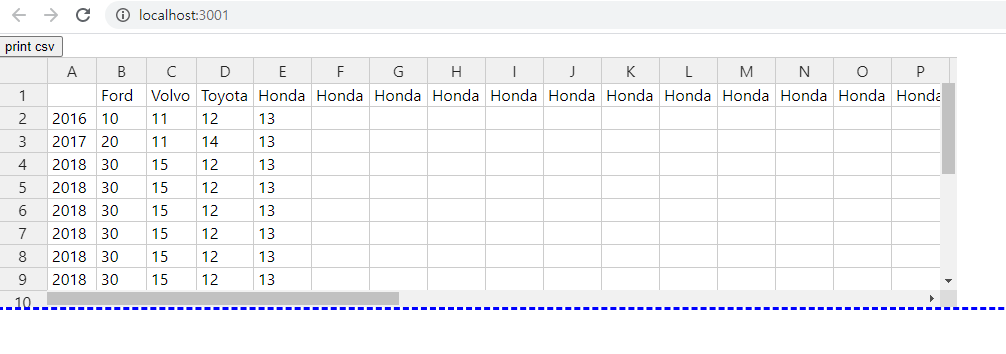
결과 화면은 아래와 같다.

Headers
column, row의 header를 감추고 싶으면 colHeaders와 rowHeaders에 false, 보이게 하려면 true로 옵션을 준다.
myTable = new Handsontable(container, {
  data: data,
  colHeaders: false,
  rowHeaders: true,
  licenseKey: "non-commercial-and-evaluation",
});
column의 header가 사라진 것을 알 수 있다.
Grid Sizing
width와 height를 옵션으로 주면 된다.
  myTable = new Handsontable(container, {
    data: data,
    colHeaders: true,
    rowHeaders: true,
    width: "50%",
    height: "250px",
    licenseKey: "non-commercial-and-evaluation",
  });
};
%와 px로 옵션을 줄 수 있다.
하지만 height를 100%로 줄 경우 아래의 결과가 나온다.

설명을 보면 block element이기 때문에 100%도 0px로 나오게 된다.

따라서 height option은 절댓값을 주던가, 옵션을 빼버리는 것이 좋다.
Resizing
column과 row의 최초 크기를 조정하고 싶다면 colWidths와 rowHeights에 배열을 넘긴다.
myTable = new Handsontable(container, {
  data: data,
  colHeaders: true,
  rowHeaders: true,
  width: "50%",
  colWidths: [45, 100, 160, 60, 80, 80, 80],
  rowHeights: [50, 40, 100],
  licenseKey: "non-commercial-and-evaluation",
});
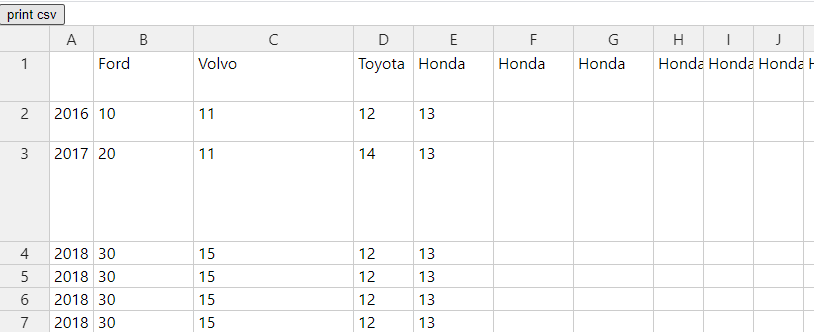
변경된 size의 결과는 아래와 같다.
column과 row를 resize하는 옵션을 주고 싶다면 manualColumn/RowResize option을 true로 주면 된다.
myTable = new Handsontable(container, {
  data: data,
  colHeaders: true,
  rowHeaders: true,
  width: "50%",
  manualColumnResize: true,
  manualRowResize: true,
  licenseKey: "non-commercial-and-evaluation",
});
column, row 모두 resizing 해보자.
Moving
column과 row를 움직이고 싶다면 manualColumn/RowMove에 true로 옵션을 준다.
myTable = new Handsontable(container, {
  data: data,
  colHeaders: true,
  rowHeaders: true,
  width: "50%",
  manualColumnMove: true,
  manualRowMove: true,
  licenseKey: "non-commercial-and-evaluation",
});
column과 row를 움직여보자.
Fixing
fixedRowsTop과 fixedColumnsLeft에 option을 주면 cell을 fix 할 수 있다.
myTable = new Handsontable(container, {
  data: data,
  colHeaders: true,
  rowHeaders: true,
  width: "50%",
  fixedRowsTop: 2,
  fixedColumnsLeft: 3,
  licenseKey: "non-commercial-and-evaluation",
});
A,B,C와 1, 2가 고정된 것을 알 수 있다.

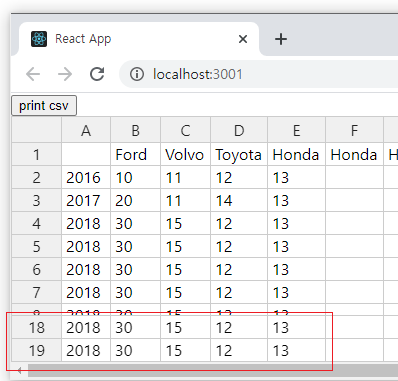
fixedRowsBottom에 옵션을 주면 아래 row를 고정한다.
myTable = new Handsontable(container, {
  data: data,
  colHeaders: true,
  rowHeaders: true,
  width: "50%",
  fixedRowsBottom: 2,
  licenseKey: "non-commercial-and-evaluation",
});
18, 19가 고정되는 것을 알 수 있다.
추가 옵션은 링크를 참고하자
'개발 > React' 카테고리의 다른 글
| React Handsontable로 csv 편집기 만들기 (12) (0) | 2021.06.08 |
|---|---|
| React Handsontable로 csv 편집기 만들기 (11) (0) | 2021.06.07 |
| React Handsontable로 csv 편집기 만들기 (9) (1) | 2021.06.05 |
| React Handsontable로 csv 편집기 만들기 (8) (0) | 2021.06.04 |
| React Handsontable로 csv 편집기 만들기 (7) (0) | 2021.06.03 |


댓글