반응형
아래와 같은 카테고리가 있다고 가정하자.
name이 실제 웹에서 보이는 문자열이고, 내부적으로는 value로 필터링을 한다.
const categories = [
  {
    name : "자주 묻는 질문",
    value : "all"
  },
  {
    name : "카테고리 1",
    value : "category1"
  },
  {
    name : "카테고리 2",
    value : "category2"
  },
  {
    name : "카테고리 3",
    value : "category3"
  },
];
카테고리는 Q&A, FAQ 등을 분류하기 위해서 사용할 예정이다.
const qnalist = [
  {
    category: "category1",
    question: "what is that ? 1",
    answer: "this is react. 1",
  },
  {
    category: "category2",
    question: "what is that ? 2",
    answer: "this is react. 2",
  },
  ...
}
카테고리필터 component는 전체 카테고리 리스트인 categories와 현재 선택한 category의 useState를 넘겨준다.
const [category, setCatecory] = useState("all");

return (
  <div>
    <div>faq</div>
    <CategoryFilter
      categories={categories}
      category={category}
      setCatecory={setCatecory}
    />
  </div>
);
넘겨받은 props로 categories의 map을 이용해 카테고리 목록을 만든다.
그리고 categories의 value와 category가 같은 경우, selected가 추가된 css를 적용하도록 한다.
//CategoryFilter.js
import React from "react";

import "../css/CategoryFilter.css";

const CategoryFilter = ({ categories, category, setCatecory }) => {
  const makeCategories = () => {
    if (categories.length === 0) return;

    return categories.map((item, idx) => (
      <div
        key={idx}
        className={item.value === category ? "category-child selected" : "category-child"}
        onClick={() => setCatecory(item.value)}
      >
        {item.name}
      </div>
    ));
  };

  return (
    <div>
      <div className="category-set">{makeCategories()}</div>
    </div>
  );
};

export default CategoryFilter;
이제 localStorage를 이용해서 현재 선택한 카테고리를 계속해서 유지하도록 한다.
아래와 같이 키를 만든다.
const LS_KEY_CATEGORY = "LS_KEY_CATEGORY";
setCategory를 한 후, 로컬 스토리지에도 setItem을 이용하여 기억해둔다.
        onClick={() => {
          setCatecory(item.value);
          localStorage.setItem(LS_KEY_CATEGORY, item.value);
        }}
useEffect로 localStorage에 값이 있는 경우에는 카테고리를 설정하도록 코드를 추가한다.
  const init = () => {
    let data = localStorage.getItem(LS_KEY_CATEGORY);
    if (data !== null) setCatecory(data);
  };

  useEffect(init, []);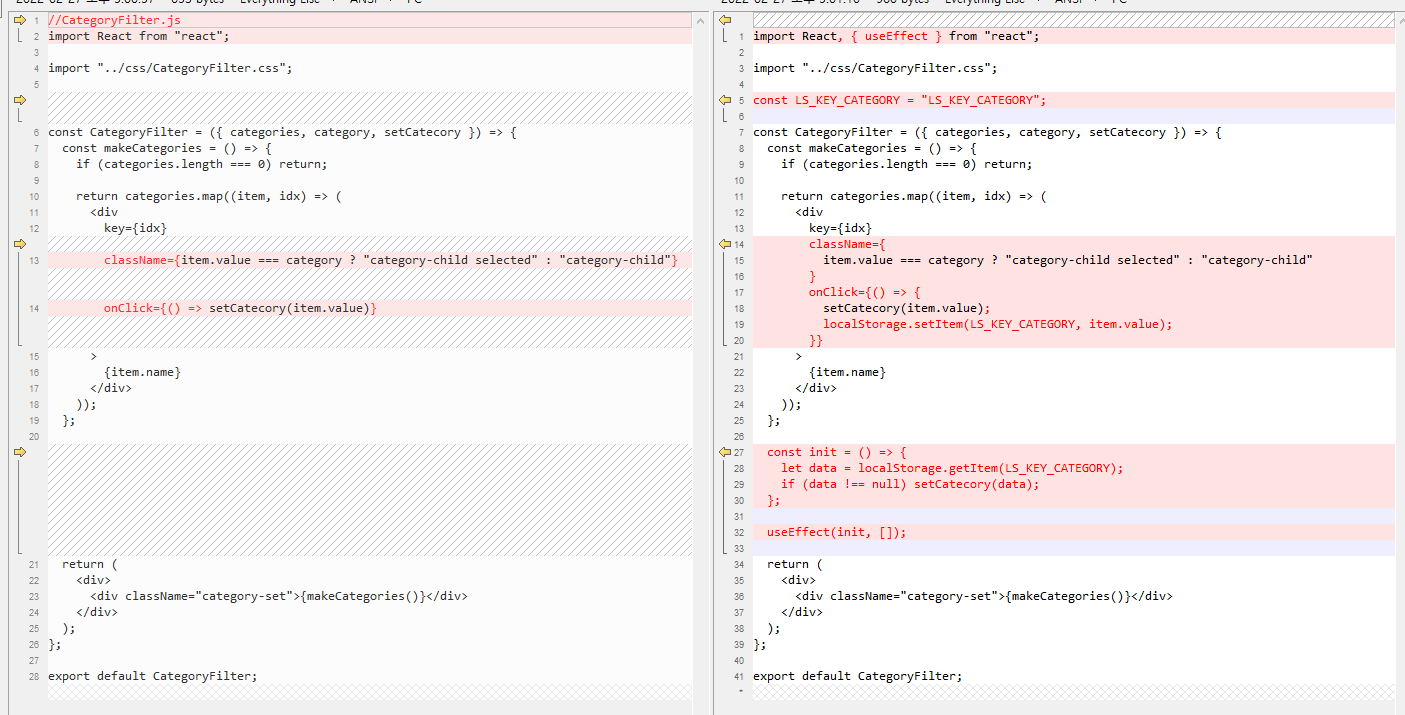
css까지 적용할 경우 아래의 카테고리를 볼 수 있다. 도중에 새로고침을 하면 현재의 카테고리를 유지한다.
최종 코드는 아래와 같다.
//CategoryFilter.js
import React, { useEffect } from "react";

import "../css/CategoryFilter.css";

const LS_KEY_CATEGORY = "LS_KEY_CATEGORY";

const CategoryFilter = ({ categories, category, setCatecory }) => {
  const makeCategories = () => {
    if (categories.length === 0) return;

    return categories.map((item, idx) => (
      <div
        key={idx}
        className={
          item.value === category ? "category-child selected" : "category-child"
        }
        onClick={() => {
          setCatecory(item.value);
          localStorage.setItem(LS_KEY_CATEGORY, item.value);
        }}
      >
        {item.name}
      </div>
    ));
  };

  const init = () => {
    let data = localStorage.getItem(LS_KEY_CATEGORY);
    if (data !== null) setCatecory(data);
  };

  useEffect(init, []);

  return (
    <div>
      <div className="category-set">{makeCategories()}</div>
    </div>
  );
};

export default CategoryFilter;
import React, { useState } from "react";
import CategoryFilter from "../components/CategoryFilter";

const categories = [
  {
    name : "자주 묻는 질문",
    value : "all"
  },
  {
    name : "카테고리 1",
    value : "category1"
  },
  {
    name : "카테고리 2",
    value : "category2"
  },
  {
    name : "카테고리 3",
    value : "category3"
  },
];

const FAQ = () => {
  const [category, setCatecory] = useState("all");

  return (
    <div>
      <div>faq</div>
      <CategoryFilter
        categories={categories}
        category={category}
        setCatecory={setCatecory}
      />
    </div>
  );
};

export default FAQ;
css는 아래를 참고하자.
.category-set {
  margin-top: 3px;
}

.category-child {
  margin: 5px;
  display: inline-flex;
  align-items: center;
  justify-content: center;
  padding-left: 0;
  border: 1px solid grey;
  background-color: #fff;
  width: 130px;
  height: 50px;
  border-radius: 50px;
}

.category-child:hover {
  font-weight: bolder;
  border-color: black;
}

.selected {
  border-style: none;
  font-weight: 800;
  background: rgb(12, 77, 162);
  color: #fff;
}
반응형
'개발 > React' 카테고리의 다른 글
| 리액트 html 코드 삽입하기 (dangerouslySetInnerHTML) (0) | 2022.03.01 |
|---|---|
| 리액트 - FAQ 카테고리 만들기 (0) | 2022.03.01 |
| 리액트 라우터 react router (최신 node ver) (2) | 2022.02.20 |
| 리액트 - window pm2 react 구동시 syntax error 해결방법 (0) | 2022.02.19 |
| 리액트 라우터 - URL query string 받아오기 (0) | 2022.02.07 |


댓글