참고
- 예제 확인 링크
- install
테이블을 사용하기 위해 npm으로 mui table을 설치하자.
npm install material-react-table
가장 기본적인 예제로 만들어진 MaterialReactTable을 사용해보자.
import React, { useMemo } from 'react';
import MaterialReactTable from 'material-react-table';

//nested data is ok, see accessorKeys in ColumnDef below
const data = [
  {
    name: {
      firstName: 'John',
      lastName: 'Doe',
    },
    address: '261 Erdman Ford',
    city: 'East Daphne',
    state: 'Kentucky',
  },
  {
    name: {
      firstName: 'Jane',
      lastName: 'Doe',
    },
    address: '769 Dominic Grove',
    city: 'Columbus',
    state: 'Ohio',
  },
  {
    name: {
      firstName: 'Joe',
      lastName: 'Doe',
    },
    address: '566 Brakus Inlet',
    city: 'South Linda',
    state: 'West Virginia',
  },
  {
    name: {
      firstName: 'Kevin',
      lastName: 'Vandy',
    },
    address: '722 Emie Stream',
    city: 'Lincoln',
    state: 'Nebraska',
  },
  {
    name: {
      firstName: 'Joshua',
      lastName: 'Rolluffs',
    },
    address: '32188 Larkin Turnpike',
    city: 'Charleston',
    state: 'South Carolina',
  },
];

const MaterialTable = () => {
  //should be memoized or stable
  const columns = useMemo(
    () => [
      {
        accessorKey: 'name.firstName', //access nested data with dot notation
        header: 'First Name',
      },
      {
        accessorKey: 'name.lastName',
        header: 'Last Name',
      },
      {
        accessorKey: 'address', //normal accessorKey
        header: 'Address',
      },
      {
        accessorKey: 'city',
        header: 'City',
      },
      {
        accessorKey: 'state',
        header: 'State',
      },
    ],
    [],
  );

  return <MaterialReactTable columns={columns} data={data} />;
};

export default MaterialTable;
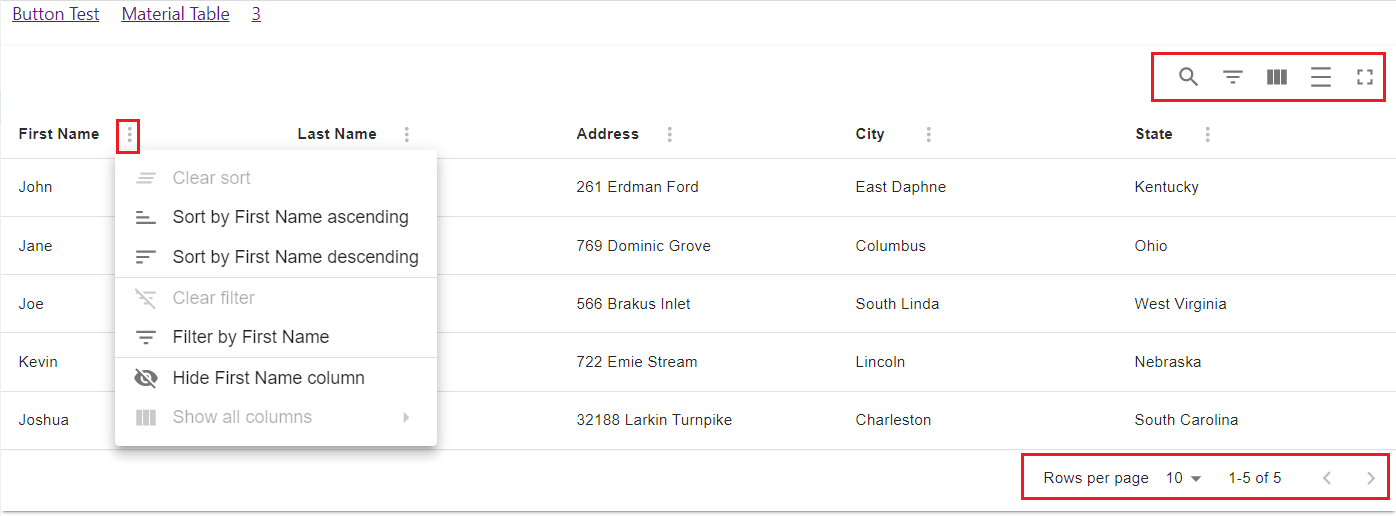
columns에 key와 header를 설정하고, data를 넣어주기만 하면 된다.
기본적인 Table임에도 Sort, Filter, Pagination 기능이 들어가있다.
Column Options
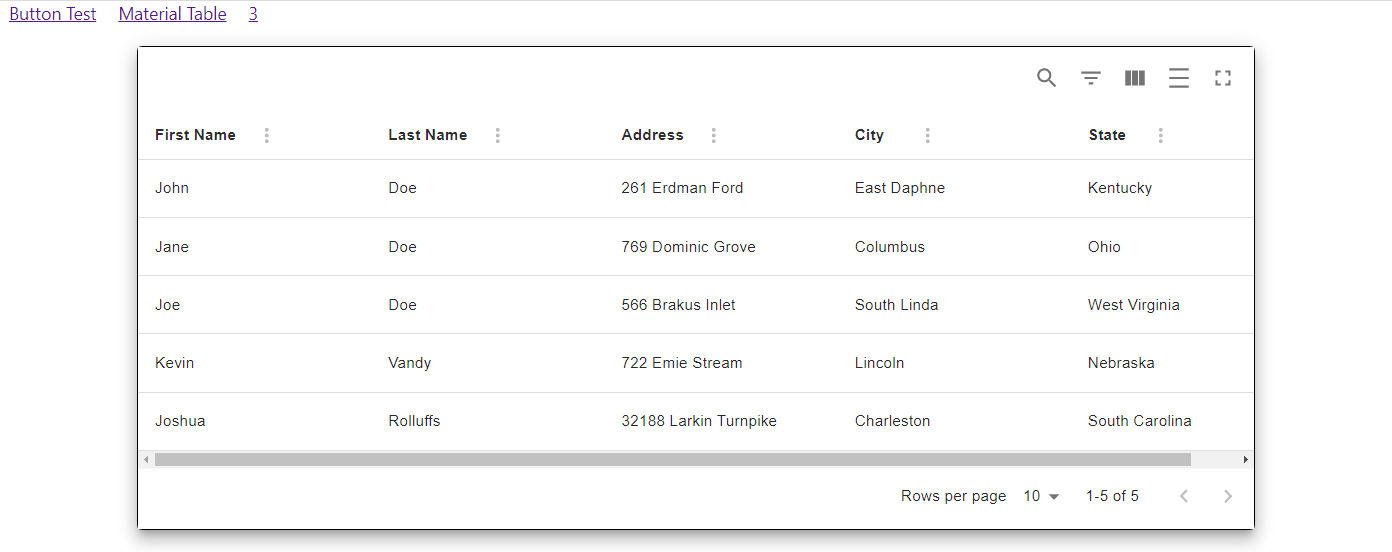
muiTablePaperProps는 그림자 효과, 너비, border 등을 설정할 수 있다.
아래는 elevation으로 그림자 효과를 주었고, margin: "0 auto"로 테이블을 가운데로 오게 설정하였다.
그리고 너비를 70%, 외각에 검은색 선 효과를 주는 옵션이다.
    <MaterialReactTable
      muiTablePaperProps={{
        elevation: 10, // shadow effect
        sx: {
            margin: "0 auto",
            width: "70%",
            border: "1px solid black",
        }
      }}
      columns={columns}
      data={data}
    />
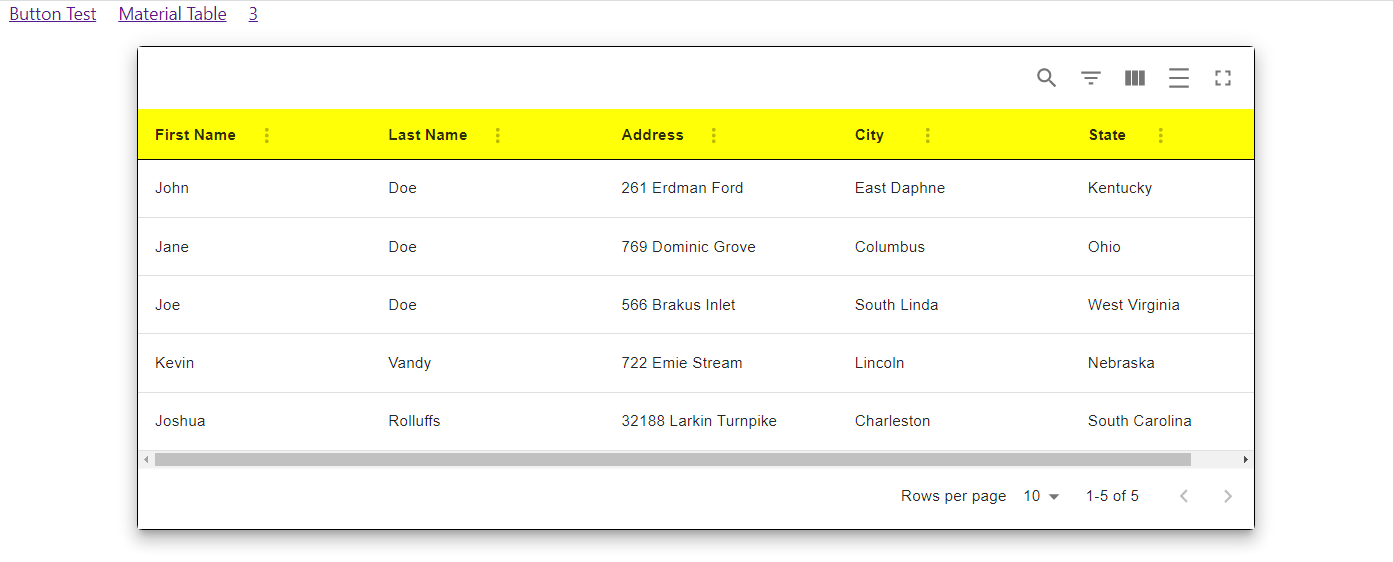
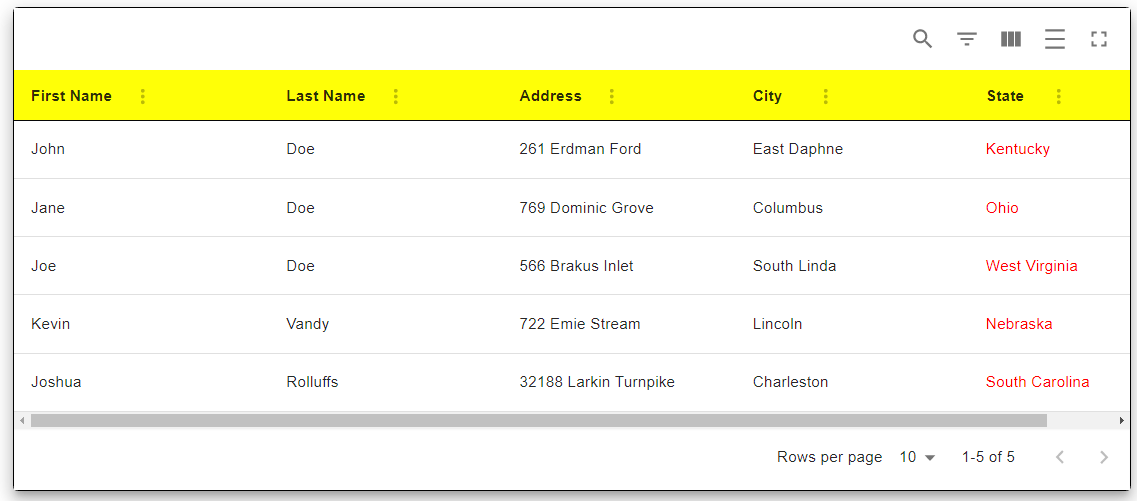
Table의 Head만 수정하고 싶다면 muiTableHeadCellProps 컴포넌트를 수정한다.
    <MaterialReactTable
      muiTableHeadCellProps={{
        sx: {
          backgroundColor: "yellow",
          BorderStyle: "solid",
          borderWidth: "1px 0px 1px 0px",
          borderColor: "black black black black"
        },
      }}
      muiTablePaperProps={{
        elevation: 10, // shadow effect
        sx: {
            margin: "0 auto",
            width: "80%",
            border: "1px solid black",
        }
      }}

      columns={columns}
      data={data}
    />
그 외 기능을 추가하는 방법도 있다.
예를 들어 enablePinning(v2 enableColumnPinning) MaterialReactTable에 추가하면 고정 기능을 사용할 수 있게 된다.
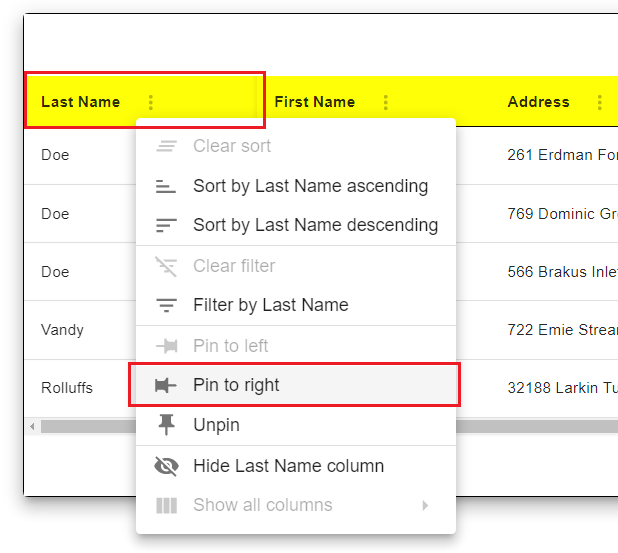
추가로 옵션을 더 보고 싶다면 column options를 참고하자.
Cell 관리하기
columns에서 Cell의 너비를 조정할 수 있다.
size를 추가하면 되지만 최소값보다 줄어들지는 않는다.
  const columns = useMemo(
    () => [
      {
        accessorKey: "name.firstName", //access nested data with dot notation
        header: "First Name",
        size: 200,
      },
또한 column options에는 Cell을 관리하는 여러 방법이 있다.
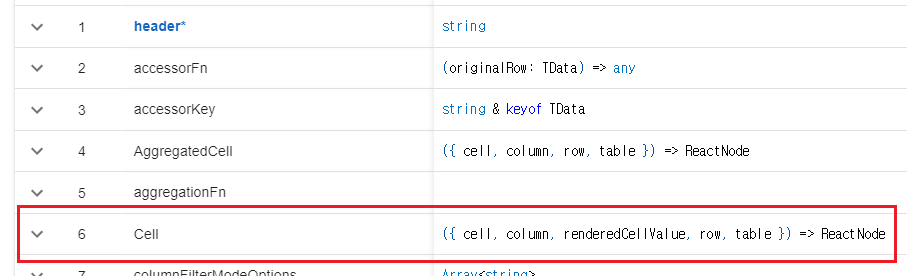
예를 들어 State 값을 모두 빨간색으로 만들어보자.
State header에 아래의 코드를 추가해보고 로그를 확인해보자.
      {
        accessorKey: "state",
        header: "State",
        Cell: ({ cell, column, renderedCellValue, row, table }) => console.log({ cell, column, renderedCellValue, row, table })
      },
cell, column 등 해당 라인에 대한 여러 정보를 알 수 있다.
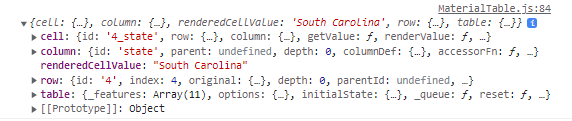
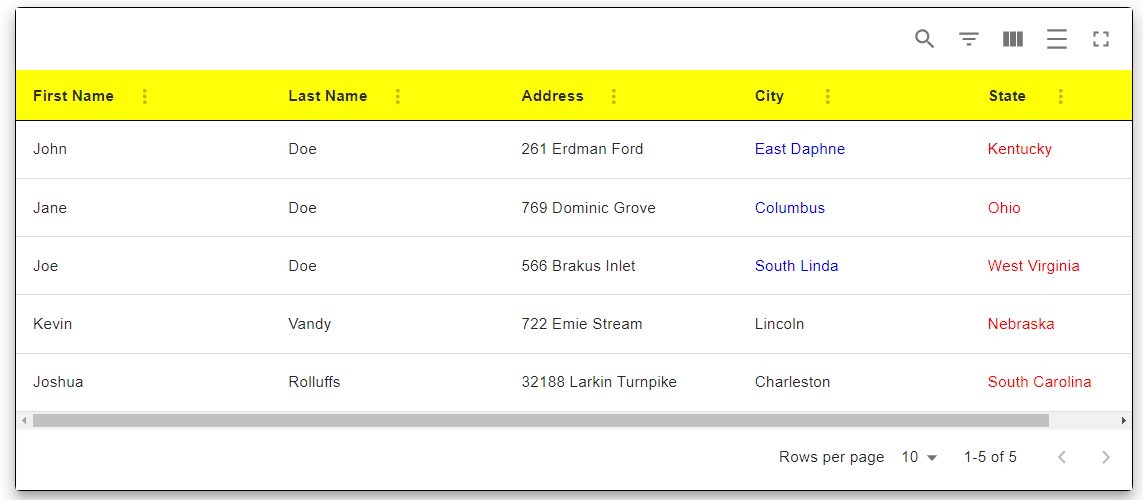
여기서 renderCellValue가 테이블에 적혀있는 값이므로 아래와 같이 수정하면 State를 빨갛게 만들 수 있다.
      {
        accessorKey: "state",
        header: "State",
        Cell: ({ renderedCellValue }) => {
          return <span style={{ color: "red" }}>{renderedCellValue}</span>;
        },
      },
결과는 다음과 같다.
만약에 Last Name이 Doe인 경우만 City를 파랗게 만들고 싶다면?
이 경우는 renderedCellValue로만 처리할 수 없으므로, row를 추가로 이용한다.
row의 _valuesCache에서 다른 Header의 값을 알 수 있다.
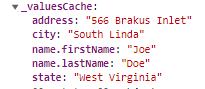
예시는 다음과 같다.
  const makeBlue = (city, name) => {
    if (name === "Doe") return <span style={{ color: "blue" }}>{city}</span>;
    return city;
  };

  ...

      {
        accessorKey: "city",
        header: "City",
        Cell: ({ renderedCellValue, row }) =>
          makeBlue(renderedCellValue, row._valuesCache["name.lastName"]),
      },
이제 Last Name이 Doe인 경우만 City의 글자색이 파란색으로 설정된다.
마지막으로 한 칸 건너뛰면서 배경색을 바꾸고 싶다면 muiTableBodyProps에 아래의 내용을 추가하면 된다.
  <MaterialReactTable
    ...

    muiTableBodyProps={{
      sx: {
        //stripe the rows, make odd rows a darker color
        '& tr:nth-of-type(odd)': {
          backgroundColor: 'skyblue',
        },
      },
    }}

    columns={columns}
    data={data}
    enablePinning
  />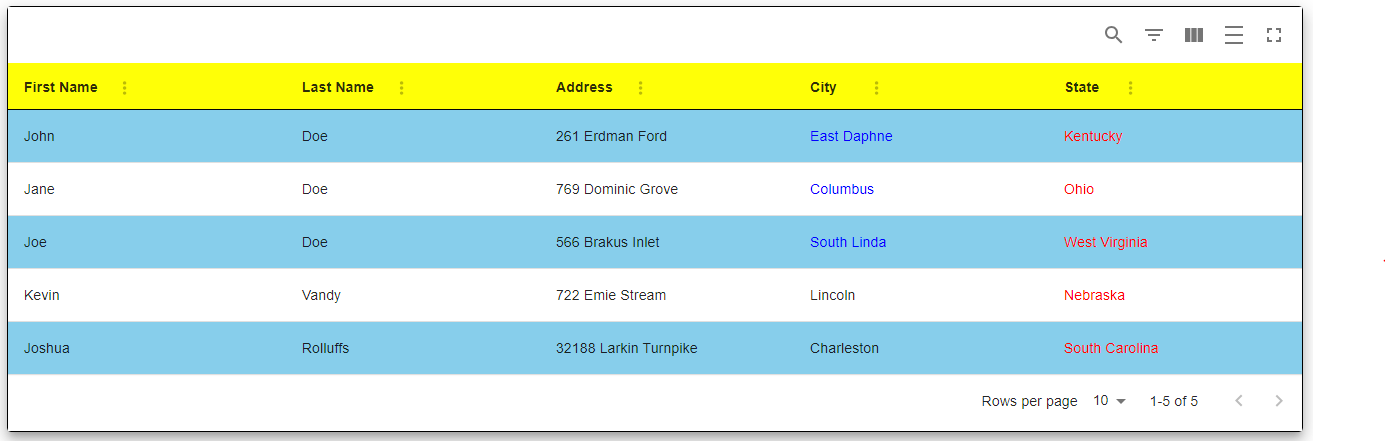
전체 코드는 다음과 같다.
import React, { useMemo } from "react";
import MaterialReactTable from "material-react-table";

//nested data is ok, see accessorKeys in ColumnDef below
const data = [
  {
    name: {
      firstName: "John",
      lastName: "Doe",
    },
    address: "261 Erdman Ford",
    city: "East Daphne",
    state: "Kentucky",
  },
  {
    name: {
      firstName: "Jane",
      lastName: "Doe",
    },
    address: "769 Dominic Grove",
    city: "Columbus",
    state: "Ohio",
  },
  {
    name: {
      firstName: "Joe",
      lastName: "Doe",
    },
    address: "566 Brakus Inlet",
    city: "South Linda",
    state: "West Virginia",
  },
  {
    name: {
      firstName: "Kevin",
      lastName: "Vandy",
    },
    address: "722 Emie Stream",
    city: "Lincoln",
    state: "Nebraska",
  },
  {
    name: {
      firstName: "Joshua",
      lastName: "Rolluffs",
    },
    address: "32188 Larkin Turnpike",
    city: "Charleston",
    state: "South Carolina",
  },
];

const MaterialTable = () => {
  const makeBlue = (city, name) => {
    if (name === "Doe") return <span style={{ color: "blue" }}>{city}</span>;
    return city;
  };

  //should be memoized or stable
  const columns = useMemo(
    () => [
      {
        accessorKey: "name.firstName", //access nested data with dot notation
        header: "First Name",
        size: 200,
      },
      {
        accessorKey: "name.lastName",
        header: "Last Name",
      },
      {
        accessorKey: "address", //normal accessorKey
        header: "Address",
      },
      {
        accessorKey: "city",
        header: "City",
        Cell: ({ renderedCellValue, row }) =>
          makeBlue(renderedCellValue, row._valuesCache["name.lastName"]),
      },
      {
        accessorKey: "state",
        header: "State",
        Cell: ({ renderedCellValue }) => {
          return <span style={{ color: "red" }}>{renderedCellValue}</span>;
        },
      },
    ],
    []
  );

  return (
    <MaterialReactTable
      muiTableHeadCellProps={{
        sx: {
          backgroundColor: "yellow",
          BorderStyle: "solid",
          borderWidth: "1px 0px 1px 0px",
          borderColor: "black black black black",
        },
      }}
      muiTablePaperProps={{
        elevation: 10, // shadow effect
        sx: {
          margin: "0 auto",
          width: "80%",
          border: "1px solid black",
        },
      }}
      muiTableBodyProps={{
        sx: {
          //stripe the rows, make odd rows a darker color
          "& tr:nth-of-type(odd)": {
            backgroundColor: "skyblue",
          },
        },
      }}
      columns={columns}
      data={data}
      enablePinning
    />
  );
};

export default MaterialTable;
결과는 링크에서 확인하자.


댓글