유니티 - OpenGL로 화면 터치 이펙트 만들기 (Simple Screen Touch Effect with Unity GL)
참고
화면을 클릭했을 때, OpenGL로 터치 이펙트를 간단히 만들어보자.

삼각형 그리기
Unity GL 클래스에서는 Circle을 제공하지 않는다.

따라서 삼각형을 여러 개 그려서 원처럼 보이게 하면 된다.
먼저 아래 스크립트를 카메라에 추가해서 삼각형을 그려보자.
클릭한 화면의 좌표를 list에 추가하여 삼각형을 그리게 하였다.
using System.Collections;
using System.Collections.Generic;
using UnityEngine;

public class MobileTouch : MonoBehaviour
{
    Material mat;
    Vector3 touchPos;
    List<Vector3> list;

    void OnPostRender()
    {
        if (!mat)
        {
            Debug.LogError("Please Assign a material on the inspector");
            return;
        }

        if (true)
        {
            GL.PushMatrix();
            mat.SetPass(0);

            GL.LoadOrtho();

            GL.Begin(GL.TRIANGLES);
            GL.Color(Color.red);

            for(int i = 0; i < list.Count; i++)
            {
                GL.Vertex3(list[i].x, list[i].y, 0);
            }

            GL.End();
            GL.PopMatrix();
        }

    }

    void Start()
    {
        mat = new Material(Shader.Find("Draw/Quads"));
        list = new List<Vector3>();
    }

    void Update()
    {
        if (Input.GetMouseButtonDown(0))
        {
            Vector3 mousePos
                = new Vector3(Input.mousePosition.x, Input.mousePosition.y, -Camera.main.transform.position.z);

            touchPos = Camera.main.ScreenToViewportPoint(mousePos);
            list.Add(touchPos);

            Debug.Log(touchPos);
        }
    }
}
순서대로 클릭을 했을 때, 시계 방향인 경우 삼각형이 그려지는 것을 알 수 있다.

원 그리기
이제 삼각형을 기반으로 정다각형을 그리고, 더 세밀하게 그려서 원을 만들면 된다.
이 방법은 절차적 메시로 정다각형, 원 만들기와 비슷하다.
어쨌든, 삼각형을 그리는 것이기 때문에 GL.TRIANGLES로 시작한다.
GL.Begin(GL.TRIANGLES);
그리고 오브젝트 원형 배치를 참고하여 OpenGL 좌표에 적용한다.
    List<Vector3> pos = new List<Vector3>();

    for (int i = 0; i < numberOfTriangle; i++)
    {
        float angle = i * (Mathf.PI * 2.0f) / numberOfTriangle;

        Vector3 dot = (new Vector3(Mathf.Cos(angle), Mathf.Sin(angle), 0)) * radius;
        pos.Add(dot + touchPos);
    }

    for(int i = 0; i < numberOfTriangle - 1; i++)
    {
        GL.Vertex3(touchPos.x, touchPos.y, 0);
        GL.Vertex3(pos[i + 1].x, pos[i + 1].y, 0);
        GL.Vertex3(pos[i].x, pos[i].y, 0);
    }

    GL.Vertex3(touchPos.x, touchPos.y, 0);
    GL.Vertex3(pos[0].x, pos[0].y, 0);
    GL.Vertex3(pos[numberOfTriangle - 1].x, pos[numberOfTriangle - 1].y, 0);
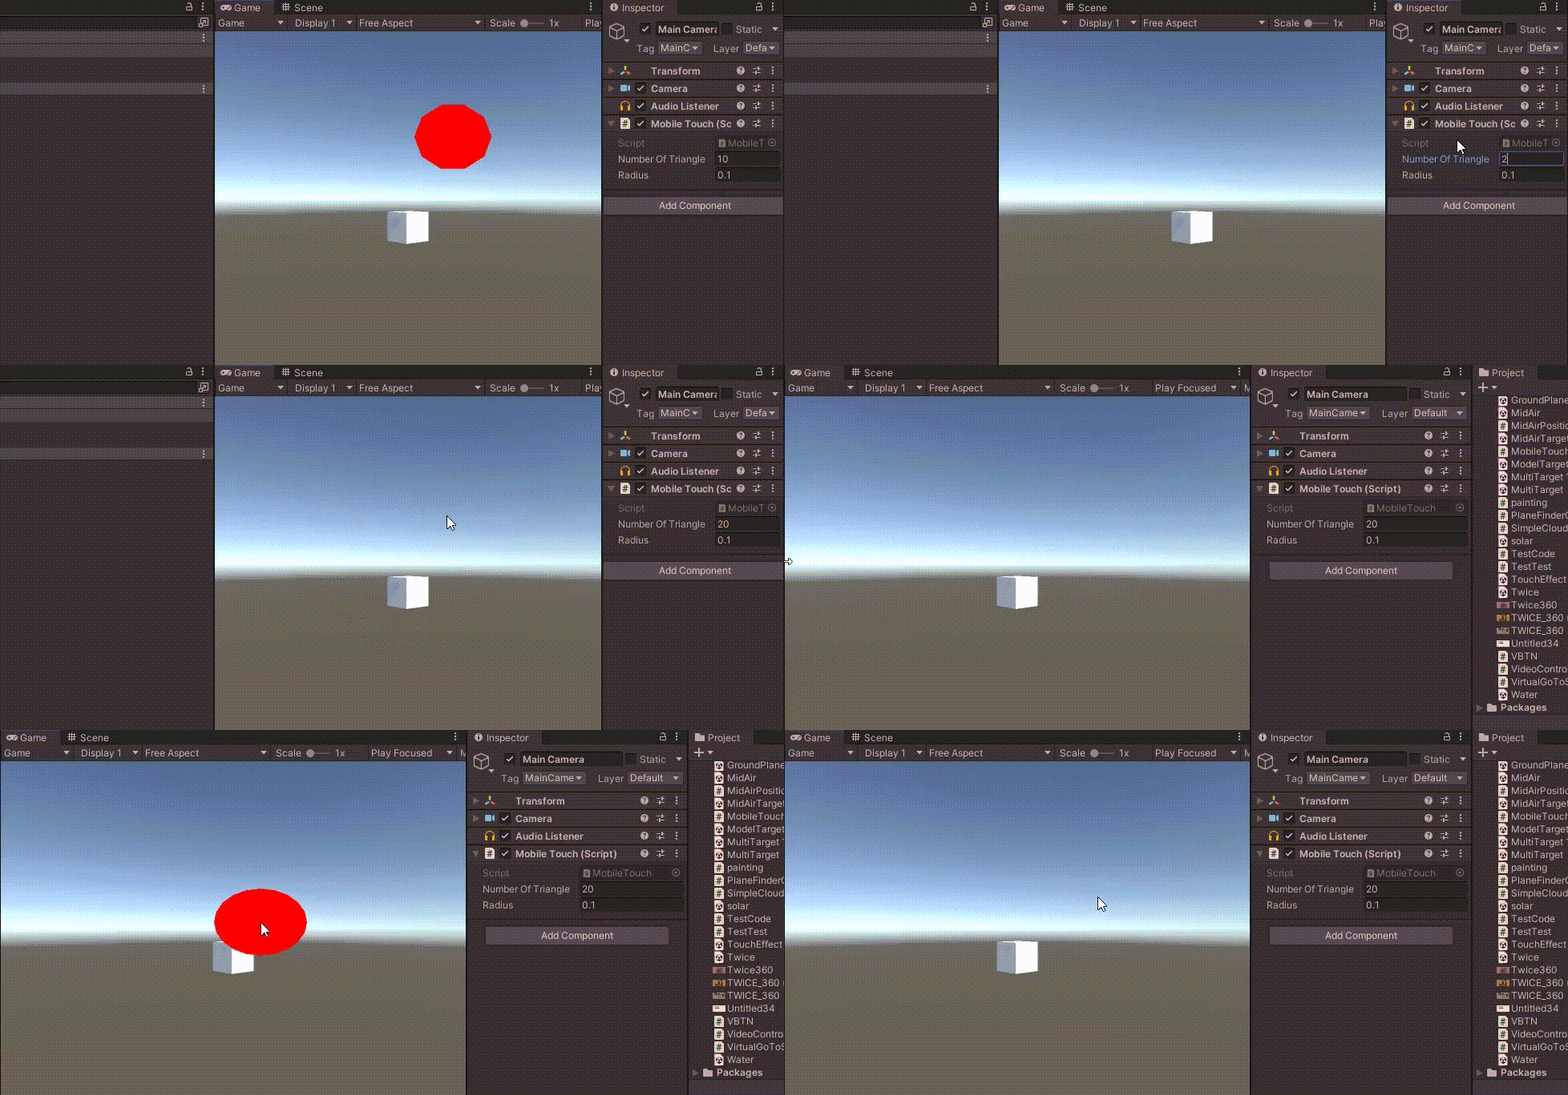
원이 만들어지는 것을 알 수 있다.
하지만 화면의 크기가 달라지면 원의 모양도 달라지게 된다.

극단적으로 가로의 길이가 길면 원도 가로로 길어진다.
GL.LoadOrtho() 설정에 의해 radius가 절대 크기가 아니라 전체 비율대로 설정되기 때문에 나타나는 현상이다.

화면의 너비와 높이는 Screen에서 알 수 있다.
Debug.Log(Screen.width + " " + Screen.height);
이 값의 비율을 이용해서 원의 반지름이 항상 균등하게 되도록 코드를 보완한다.
    for (int i = 0; i < numberOfTriangle; i++)
    {
        float angle = i * (Mathf.PI * 2.0f) / numberOfTriangle;

        Vector3 dot = (new Vector3(Mathf.Cos(angle), Mathf.Sin(angle), 0)) * radius;

        float width = (float)Screen.width;
        float height = (float)Screen.height;

        if(width > height)
        {
            dot.x = dot.x * height / width;
        }
        else
        {
            dot.y = dot.y * width / height;
        }

        pos.Add(dot + touchPos);
    }
이제 어떤 화면이라도 화면을 클릭하고 있을 때, 원이 나타나는 것을 알 수 있다.

전체 코드는 다음과 같다.
using System.Collections;
using System.Collections.Generic;
using UnityEngine;

public class MobileTouch : MonoBehaviour
{
    Material mat;
    bool touchFlag;
    Vector3 touchPos;

    public int numberOfTriangle = 10;
    public float radius = 0.1f;

    void OnPostRender()
    {
        if (!mat)
        {
            Debug.LogError("Please Assign a material on the inspector");
            return;
        }

        if (touchFlag)
        {
            GL.PushMatrix();
            mat.SetPass(0);

            GL.LoadOrtho();

            GL.Begin(GL.TRIANGLES);
            GL.Color(Color.red);

            List<Vector3> pos = new List<Vector3>();

            for (int i = 0; i < numberOfTriangle; i++)
            {
                float angle = i * (Mathf.PI * 2.0f) / numberOfTriangle;

                Vector3 dot = (new Vector3(Mathf.Cos(angle), Mathf.Sin(angle), 0)) * radius;

                float width = (float)Screen.width;
                float height = (float)Screen.height;

                if(width > height)
                {
                    dot.x = dot.x * height / width;
                }
                else
                {
                    dot.y = dot.y * width / height;
                }

                pos.Add(dot + touchPos);
            }

            for(int i = 0; i < numberOfTriangle - 1; i++)
            {
                GL.Vertex3(touchPos.x, touchPos.y, 0);
                GL.Vertex3(pos[i + 1].x, pos[i + 1].y, 0);
                GL.Vertex3(pos[i].x, pos[i].y, 0);
            }

            GL.Vertex3(touchPos.x, touchPos.y, 0);
            GL.Vertex3(pos[0].x, pos[0].y, 0);
            GL.Vertex3(pos[numberOfTriangle - 1].x, pos[numberOfTriangle - 1].y, 0);

            GL.End();
            GL.PopMatrix();
        }
    }

    void Start()
    {
        mat = new Material(Shader.Find("Draw/Quads"));
    }

    void Update()
    {
        if (Input.GetMouseButton(0))
        {
            Vector3 mousePos
                = new Vector3(Input.mousePosition.x, Input.mousePosition.y, -Camera.main.transform.position.z);

            touchPos = Camera.main.ScreenToViewportPoint(mousePos);

            touchFlag = true;

            Debug.Log(touchPos);
            Debug.Log(Screen.width + " " + Screen.height);
        }
        else
        {
            touchFlag = false;
        }
    }
}
Unity Plus:
Easy 2D, 3D, VR, & AR software for cross-platform development of games and mobile apps. - Unity Store
Have a 2D, 3D, VR, or AR project that needs cross-platform functionality? We can help. Take a look at the easy-to-use Unity Plus real-time dev platform!
store.unity.com
Unity Pro:
Unity Pro
The complete solutions for professionals to create and operate.
unity.com
Unity 프리미엄 학습:
Unity Learn
Advance your Unity skills with live sessions and over 750 hours of on-demand learning content designed for creators at every skill level.
unity.com
